Archeometallurgy: iron making with a low
shaft roman-celtic furnace
Inspired by the second siderurgy phase of
Piani d’Erna (LC) -Ist century
Cesare
Alippi, Gianpaolo Barindelli
There
is evidence that meteorites were used as a source of iron before 3000 BC, but
extraction of the metal from ores dates from about 2000 BC. Production seems to
have started in the copper-producing regions of Anatolia and
In
celtic
Once the process is over, the low-shaft furnace is
destroyed and the iron extracted for further processing. The outcome is a bloom, a
sponge-like iron structure which needs to be hammered to remove the slag and gain
a compact shape for subsequent artifact making.
In principle smelting seems easy but it is
surely not. As a matter of fact no precise recipe is available (being left in
our ancestor’s memory) and obtaining a bloom is everything but simple.
In the following we synthesise our smelting
experiments in the different phases without any quantitative analysis or
technological details.
The iron
ore
Well, it was not easy to find the raw material. At
first you have to find a mine then you need to identify a good ore. The first
attempt was a failure: we brought 30 Kg of potential ore from an Esino’s mine.
Unfortunately, they were stones since the iron content was negligible...
We moved then to the St.Aloisio mine in Val Trompia
(BS) thanks to Salvatore and Piergiuseppe. The ore was there, in the heart of
the mountain. An excellent 45% pure siderite (see Cesare active on the ore in
figure 1 and Paolo in the mine, figure 2).
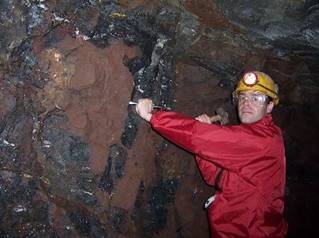
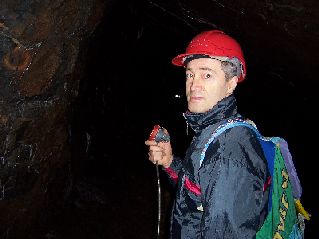
Figure 1 : Cesare and the ore Figure 2 : Gianpaolo
The roasting phase
The mineral is then hammered to walnut size
pieces. The roasting phase aims at transforming siderite FeCO3 in
hematite Fe2O3 and magnetite Fe3O4 .
It can be done by interleaving layers of wood with ore and burn up the stack
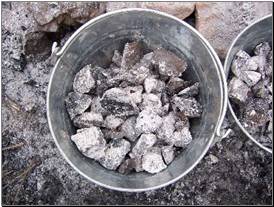
(figures 3 and 4). Even if expected the result is astonishing: the outcome can
be collected with a magnet (see figure 5 for the roasted ore).
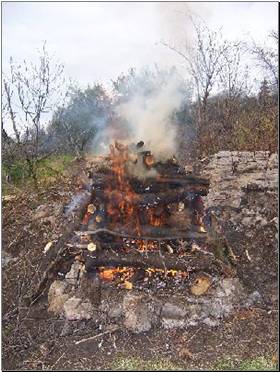
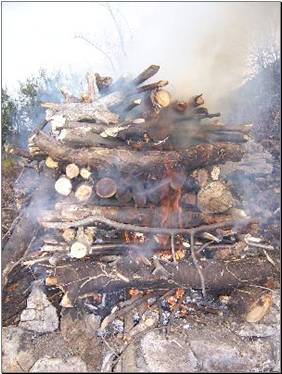
Figure 3
: Roasting furnace Figure 4 : Roasting
furnace
|
The charge A charge is a mix of roasted ore and wood
charcoal (we reasonably kept equal parts). We also added shells to provide some
additional calcium content (calcium, e.g., 5%, is beneficial in smelting
since it reacts with the slag leaving more Fe to generate the bloom). |
Figure 5 : Roasted ore |
The furnace
The furnace required 300Kg of clay that we
collected in a mountain cave (and carried on our backs!). The clay, once
cleaned from stone impurities was mixed up with fine sand (10% in our
experiment). This mix can be somehow thought as that needed for making
ceramics: it gives resistance, toughness and plasticity to the furnace and it
helps to reduce the formation of cracks during the heating process. Clay loafs
were then made out of the mixed and constituted the basic “bricks” of the
furnace.
The furnace construction started by digging the
soil and creating a stone basement onto which deploy the furnace. Then we
constructed the base (see figure 6) and the slag canal.
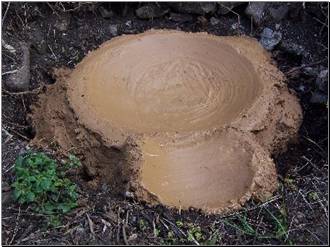
Figure
6 : Creating the shaft
Figure 7
: Building the furnace
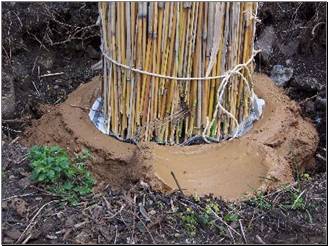
After having collected river straws, we stacked
them to configure a cylindrical shape with the largest diameter at about 35cm
from the base (figure 7 and 8). De facto, straws constituted the scaffolding of
the structure and clay bricks were piled them up having the straw structure as
a side.
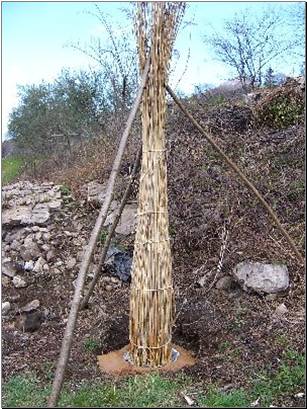
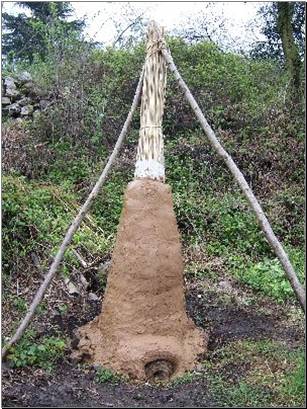
Figure 8 : Building the
furnace
Figure 9
: Building the furnace
Then we made the two tuyeres (oriented at about 25o)
and stopped the construction at about 60cm to allow the furnace to dry up
(otherwise the fresh clay would not support the weight of upper layers and the
furnace collapses).
The final structure was about 110cm in height, a
diameter at the base of around
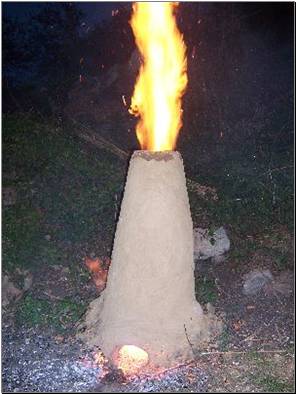

Figure 10 : Furnace
cooking
Figure 11 : Furnace
pre-heating
The reduction process
The reduction process is rather interesting and it
worths a more detailed description. In particular, around 900-1000oC,
combustion of charcoal tends to produce CO
instead of CO2 , i.e.,
the reaction 2CO+O2 ↔2CO2
is active on the left. CO plays an
active role in the reduction process (here simplified to consider only hematite
Fe2O3 and magnetite Fe3O4 presence)
Fe2O3
+CO ↔ 2FeO+CO2
FeO+CO ↔
Fe+CO2
3Fe2O3 + CO2 ↔ Fe3O4
+ CO2
Fe3O4 + CO ↔ 3FeO + CO2
Fe particles float in the slag and, through a
sintering process, get together to constitute the bloom.
Smelting
Smelting
required a full working day. Errors in the charging frequency and air flow immediately affect
temperature, then the slag quality and, finally, the formation of the bloom. No
precise written recipes are given but only experimental trials, quite often
leading to unsuccess.
The first phase
requires the furnace to be pre-heated, e.g., with wood first and then char coal
(figure 11) to allow all humidity to go out.
Once the
temperature within it is high enough (continuous sparks were coming out with
fumes), the slag door was closed with tuyeres receiving all needed air (figure
12).
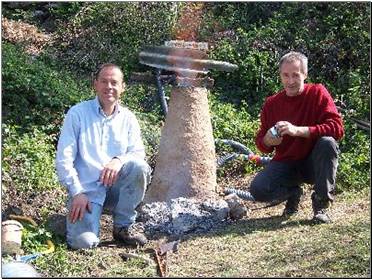
Figure 12 : Cesare and
Gianpaolo: Smelting
Charges (figure
13) where then continuously inserted from the top with a frequency depending on
the charge consumption (we experienced about 7 minutes).
We opened twice
the slag door to allow some of it leaving the furnace to keep under control
the quantity inside and allow more charges to be added; then
the door was closed again with fresh clay.
An interesting
view of the inside, i.e., the slag, can be seen from the tuyeres (figure
14).
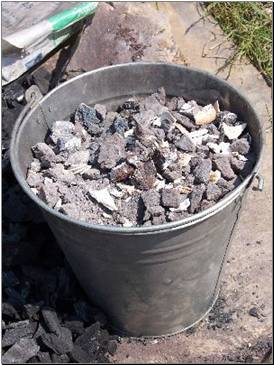
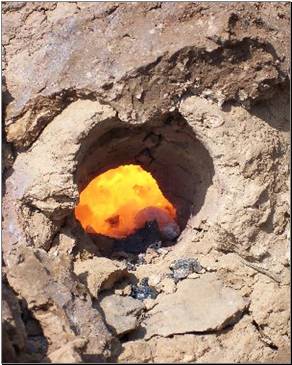
Figure 13 : Charge
Figure 14
: View from tuyere
Bloom extraction
After the last
charge was inserted the furnace operated for a good hour to allow all charges
in the chimney to be consumed. At this point the furnace was destroyed to
extract the –hopefully existing- blooms. Furnace destruction is necessary since
the slag solidifies with the bloom and the two must be separated by hammering
(figure 15).
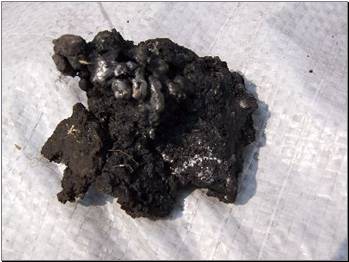
Figure 15 : A bloom
Hammering is
also important to compact the bloom (figure 16) and the result is an iron ingot
(figure 17) ready for being processed to improve its features and/or making
manufacts: les jeux sont faits.
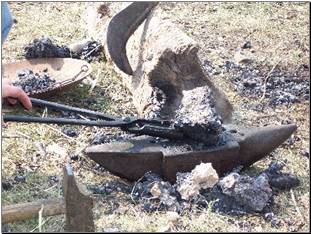
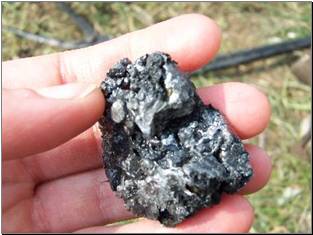
Figure 16 : Hammering
Figure 17
: The iron
VISITS :
Since 15/07/2008